
The previous Rear Belts write-up was done on my old truck, The Black Hole. A couple of differences with that truck and SlushPuppy. First off, SlushPuppy actually HAS a headliner, making the mounting point not as obvious since it’s behind the headliner. And in this installation, I have modified placement to accommodate the rear cargo cover.
Here is a complete list of what I used to complete this project:
PARTS:
One complete set of FRONT seat belts from a Grand Wagoneer. I made sure that my center buckles would latch to the shoulder straps. Some years are different than other, even within the same style. (plastic receiver vs/ metal receiver)
Two pieces of 3” x 3” angle iron, 3-4 inches long is perfect.
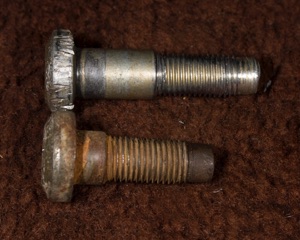
Four 7/16” x 1 1/2” bolts and nuts.
Four 7/16” Fender Washers (these are wider than regular washers)
Four 7/16” regular washers
Two cargo cover holders (the ones closest to the tailgate)
TOOLS:
Measuring tape
Long pin (a meter’s test probe works well)
7/16” Drill bit
1/2” Hand Drill
1/2” Drill Press (Optional, but makes life easier)
T-50 Torx bit (Check your bolts to verify. Yours may be different!)
3/8” to 1/2” adapter
1/2” ratchet
1/2” breaker bar
PB Blaster (loosens rusted/seized bolts)
When I removed the seat belts, I was sure to retain all the bolts, too. I used the longer of these two bolts to use to attach the belt to the roof mounting point.
To keep things looking neat, I buckle my belts when not in use.


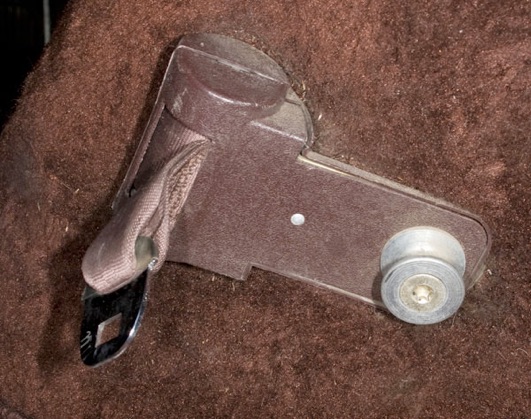
The pictures below show the metal plates drilled and test fit on the retractor assembly. I made sure that the bolt holding the retractor was placed with the head of the bolt against the metal angle. If inserted the other way, the end of the bolt will pierce the cardboard side panel.
Here is the original seat belt retractor. I removed it using a Torx bit after soaking the backside with PB Blaster. I raised the rear end on jack stands to get into the wheel well. If my lift was installed, I wouldn’t have had to do that. I started turning it with the breaker bar. Once I got it going, I used an electric impact to take all the way out.
Here is the end of the shoulder belt mounted in place of the original retractor. The end of the shoulder belt mounting strap is bent. I flattened it with a large hammer, being careful not to pound on the strap material itself. I carefully installed this end to prevent my seat belt from being hopelessly twisted. Yes, this shows the opposite side as compared to the photo above.

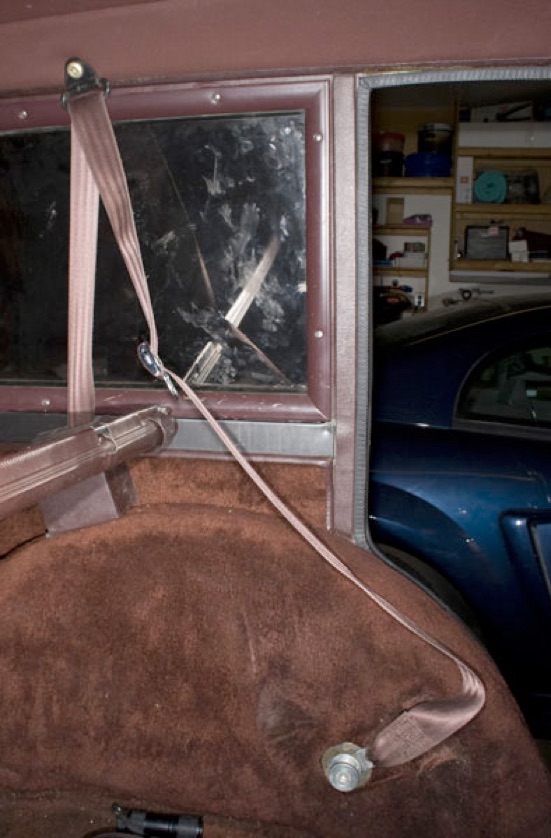
The next issue I had was finding the roof mounting point. I knew it was there. I saw it before when I last had the headliner down. After taking the headliner down AGAIN, I realized there is an easier way!
The bolt hole is lined up PERFECTLY with the rear cargo light’s screw holes. I removed the cover from the cargo light and traced a straight line from the screws to the trim strip just above the window. The hole was located about 1 1/2 inches ABOVE the BOTTOM of the trim strip. Here is where the meter probe came in handy.
I used the probe to (literally) probe and make sure I had found the correct location. Once I found the correct spot, I enlarged the hole so that the bolt would fit through it. As show previously, I used the larger of the two screws pictured.
Here is the roof mount portion of the seat belt installed. The only thing missing is the plastic cover

I test fit the angle brackets and cut out the carpet below where the bracket was to be mounted. I drilled my 7/16” hole into the fender, careful not to drill into my tire!
I mounted the retractor to the angle bracket and then bolted the assembly to the fender, using 2 fender washers against the sheet metal and finishing up with a regular washer and then of course the nut.
Here is a picture of the belt without the seat in place: (Yes, I straightened the retractor before I tightened everything down!)
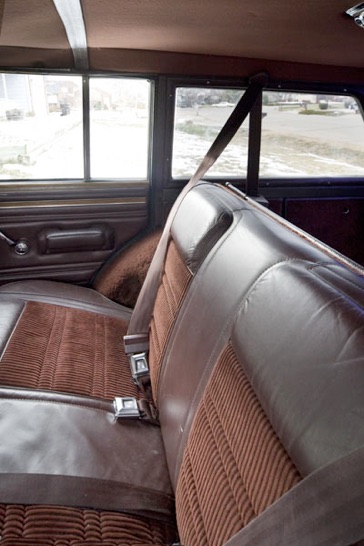
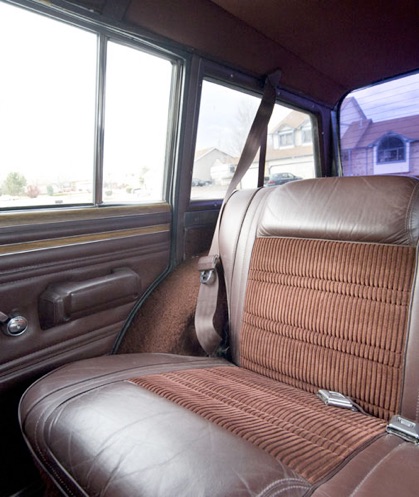
These pictures show the installed shoulder belts. Note that they will not retract completely taunt.
If the retractor was mounted on the floor, they would. However, this would take up precious cargo area and I felt it wasn’t worth it just to have them retract completely.
I could have moved the lower mounting point, but I wanted to use the stock mounting points as much as possible.
Now, about those cargo cover holders.... For those of you with cargo covers, you will quickly notice that the bar gets in the way of the cargo cover retracting all the way. To solve that problem, I put another set of cargo cover holders (the ones nearest to the tailgate) in FRONT of the seat belt retractors. Thus, the cargo cover is always slightly extended. This keeps the bar from interfering with the seat belts and the cargo cover is still useable. To remove the cover, manually push the seat belts out of the way and fully retract the cover.
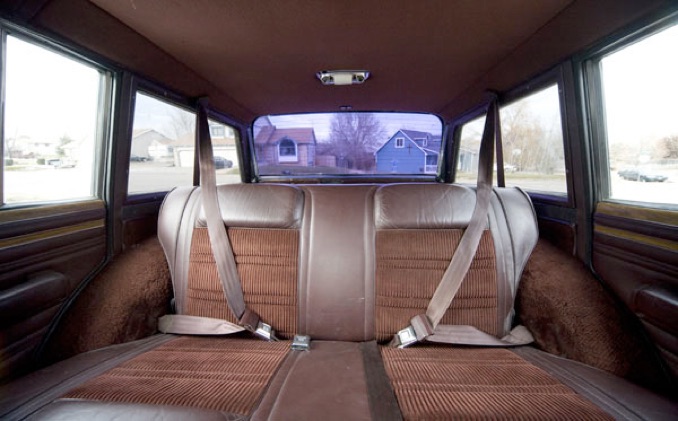
Note how the retractor is mounted behind the rear cargo cover.