Replacing the OEM gas tank with one that actually seals and keeps the gas in the tank.

The OEM tank on SlushPuppy refused to seal. Tired of smelling gas fumes and having a “stinky Jeep”, I embarked on a journey to find and fix the source of the leak.
The first stop involved buying new gas filler hoses from BJ’s Offroad. The new hoses were really nice, but they evidently weren’t what was leaking, as I still had the smell.
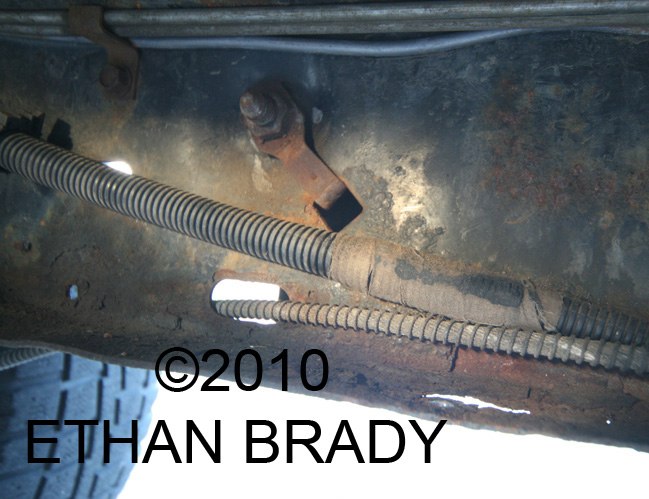
Inspecting the access panel (located under the rear seat of most 1980+ FSJs) revealed a poorly sealed fuel sender.
I tightened the locknut again, but it refused to seal. So I drained the tank and swapped with a spare tank I had in the garage. (That I had been saving for just such an occasion!) But it didn’t work. It, too, leaked at the sender and at the check valves. The grommets and check valves were only a year old, but the rubber showed signs of deterioration.
There was talk on the IFSJA boards about different gas tanks that were used as auxillary tanks for extended range. Instead, I wanted to REPLACE the OEM tank.
Off to a junkyard I went to find a tank that would fit. I found a “U-pull it” place in Denver that only put “small” holes in the gas tank that I figured I could patch later. They only charged $20 for the tank, so it was not a big deal. What I REALLY wanted to do was to be able to test fit the tank under an FSJ. Luckily, they had one in the yard.
I found a suitable donor under a 1991 Chevy S10 Blazer. The tank not only fit well, but also came from the factory with an in-tank fuel pump that is compatible with my fuel injection. I also picked up the fuel sender for a few extra dollars and they let me have the skid plate (plastic!) and mounting straps for no extra charge.
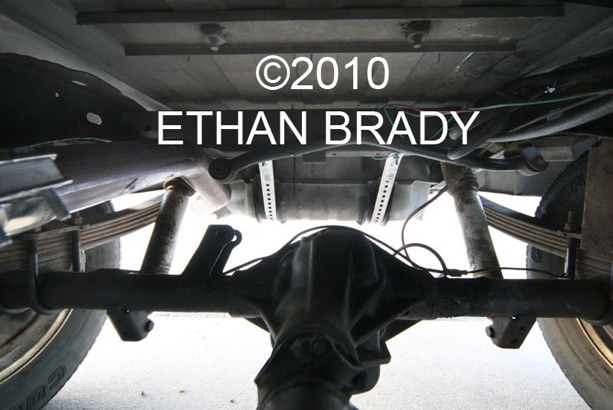
Here is the tank test fit under SlushPuppy.

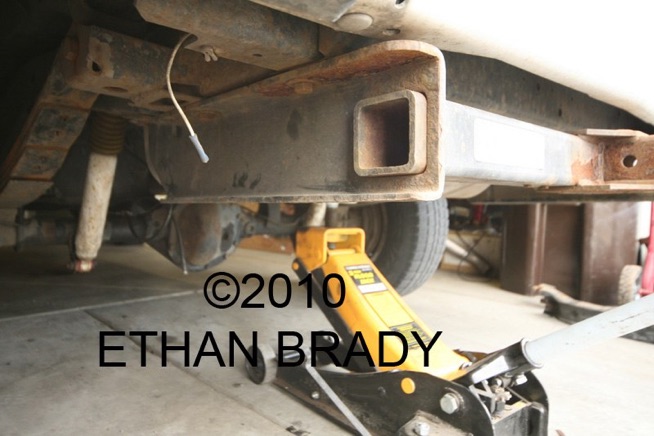
The tank hangs no lower than my trailer hitch, which will provide extra protection from rocks and such. Maybe later I’ll fabricate a real skid plate.
I moved it forward a little to provide clearance on top for the fuel sender hoses and wiring. There is a sheet metal cross member above the tank which it rests against towards the rear. The forward part of the tank rests on the “bump stops” that originally held the spare tire.

I moved it forward a little to provide clearance on top for the fuel sender hoses and wiring. There is a sheet metal cross member above the tank which it rests against towards the rear. The forward part of the tank rests on the “bump stops” that originally held the spare tire.
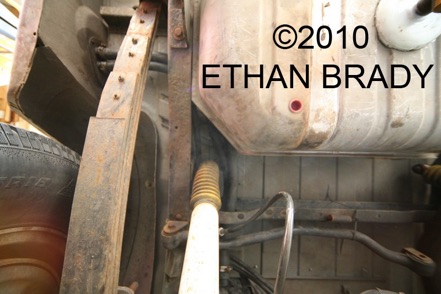
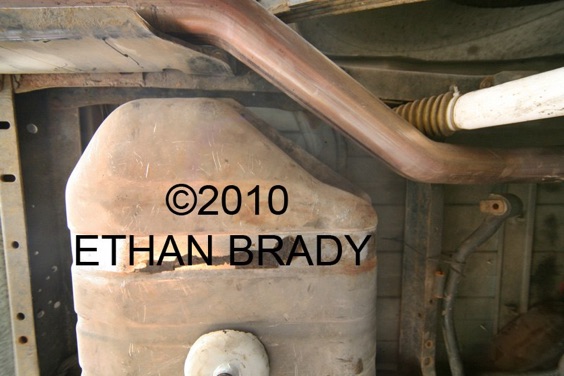
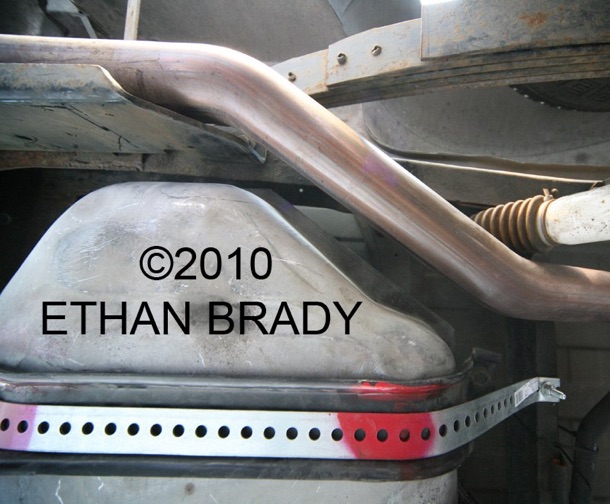
There is good clearance on all sides. The passenger side angles in perfectly to clear my 3” exhaust pipe. Thankfully, I didn’t have to re-route my exhaust!
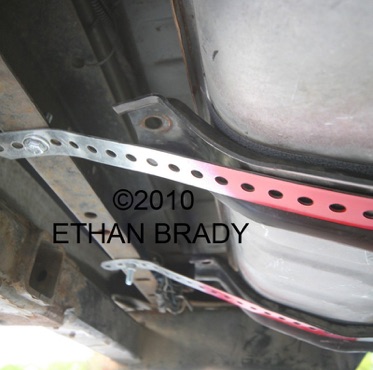
I originally planned on making new cross members to match the OEM tank straps. But that didn’t work out, so I resorted to good old strap steel. I was able to utilize existing frame holes, so this installation is truly a “bolt-on” affair!
I put the OEM straps in between the strap steel and the tank to more evenly distribute the load.
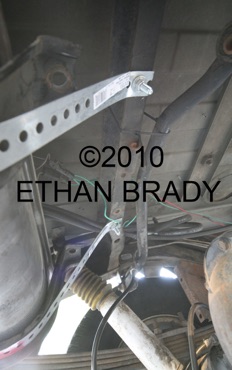
In this photo, UP is towards the rear of the of the truck. You can see the strap steel bolted to an existing cross member. The green and red wires are for the fuel pump and the fuel sender. The sender ground wire can be seen bolted to the strap on the photo’s left side.
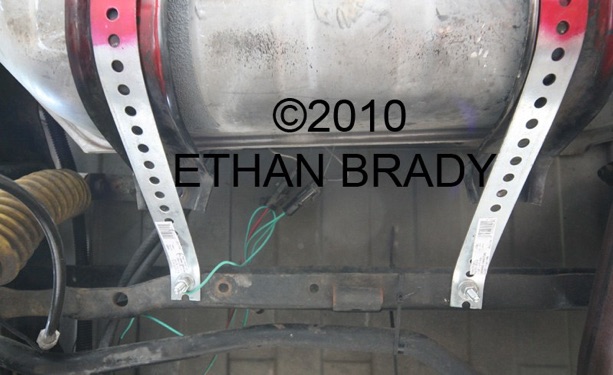
This shows the final position and clearance from the exhaust. It looks like this tank was MADE for my truck!! :D
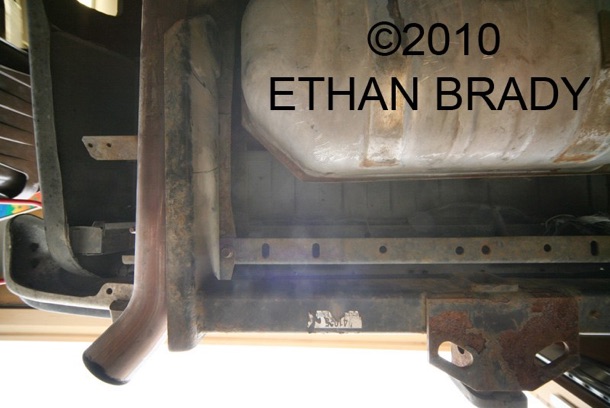
Here is a view from on top of the rear drive shaft.
The top of the photo here is towards the rear of the truck. You can see the rear vent line which I have hooked up to the vent line on the tank. There is only one vent line on the Blazer tank, so the front OEM vent line is plugged.
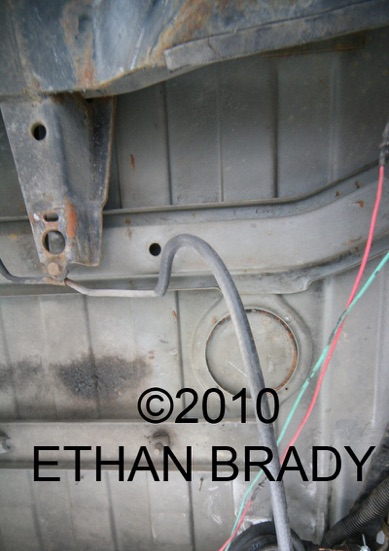
The round circle is the OEM access hatch for the fuel sender.
The forward vent line is above the transfer case and is plugged. You could also remove the Y fitting in the engine compartment, but this was easier.
This is what years of mud and moisture can do to your frame rail. The gas tank skid plate traps dirt and debris and rust can make swiss cheese out of your frame rail. Eliminating the skid plate will hopefully slow this process and will allow me to easily monitor any further damage.
The tank’s fill hose is 2 inches in diameter and the Jeep’s fill hose is 1 inch.
I looked at using the Chevy filler neck, but it wouldn’t fit.
Obviously, an adapter was needed. I kludged together an adapter consisting of pipe fittings with gasoline resistant sealer on the threads. A 1 1/2 inch pipe has an outside diameter of just under 2 inches. A tight hose clamp took care of the difference. I used a 3/4 inch pipe which ended up just slightly larger than 1 inch on the outside diameter.
I was actually able to find a brass adapter for the filler’s vent line that went from 5/8 inch to 3/4 inch outside diameter.
The tank vent lines and the fuel pump and return lines were close enough in size to each other to simply run rubber lines without adapters.
About that tank with the “small” hole in it???
After I verified that this particular tank would fit, I bought an intact tank locally from Loveland Auto Salvage. They sell the fuel sender separately, so I just used the one I had gotten from the U-Pull-It yard. It was only $40 and I figured it was worth it to not have to worry about a “patch” going bad somewhere out on the trail.
Replacing the OEM fuel tank will hopefully cure the “stinky Jeep” issue as well as provide years of trouble-free service with a “factory” TBI pump setup.
Little by little, my Jeep seems to be transforming into a GM product...