Welding an AMC “Duraspark” Distributor

Here is how I welded the AMC distributor to prepare it for a TBI conversion with computer controlled timing.
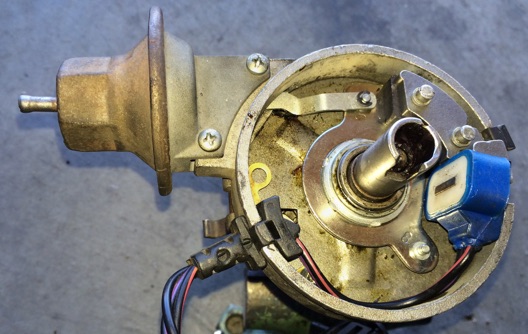
This distributor is used on later 80’s era AMC 360 motors. The nice thing is that the variable reluctor (VR) pickup is compatible with the GM system so it is virtually plug n play. All that is needed is to secure the distributor centrifugal timing control.
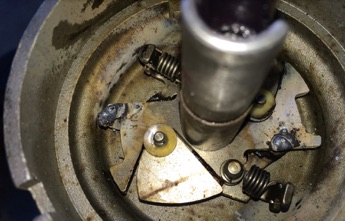
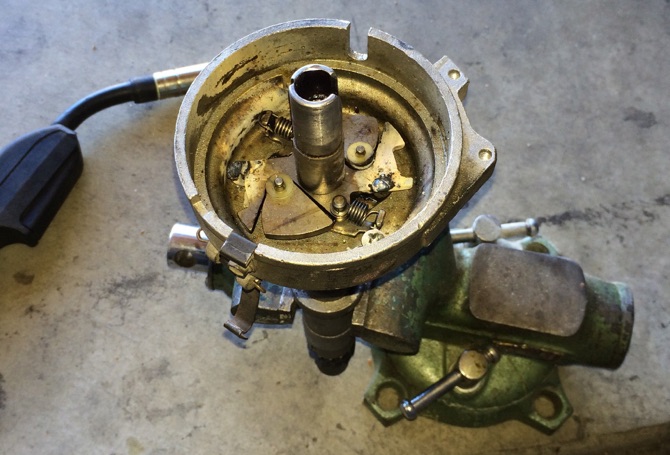
This is the factory OEM centrifugal advance system:
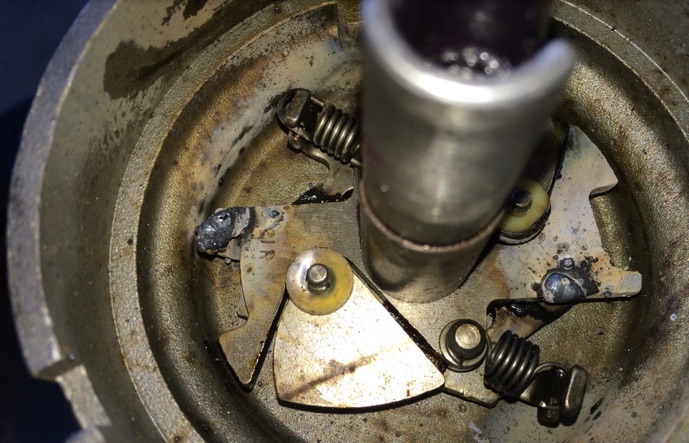
The springs hold the timing advance to zero until the distributor is spinning fast enough that the weights move and advance the timing.
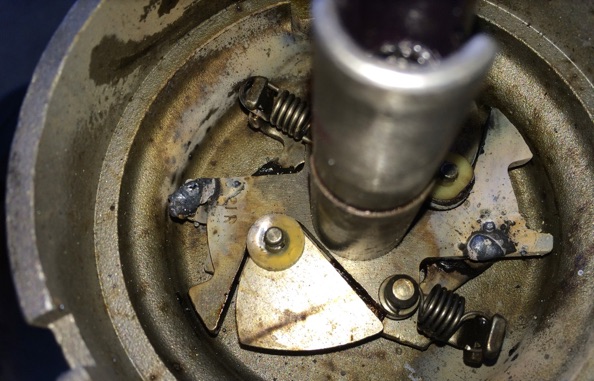
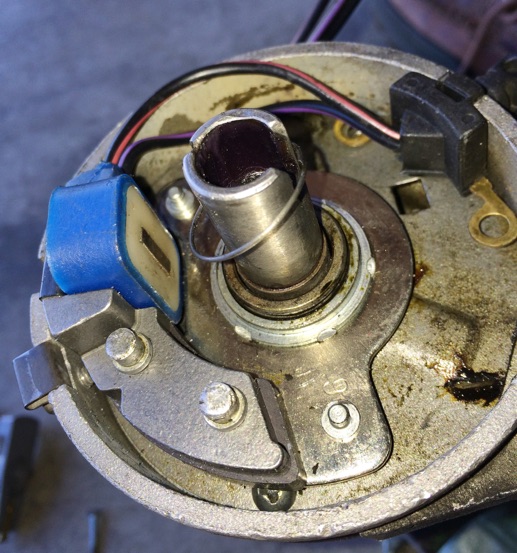
You don’t want this to happen with computer controlled timing, so you want to lock it out like this:

Note that I put a weld spot on the opposite side to help balance out the balance of the rotor (rotating) assembly.
So, how do you get to this point?
Follow along.....
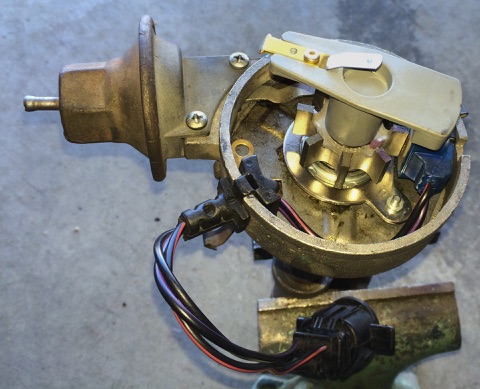
Here is the distributor with the top cap (part that the plug wires attach to) removed.
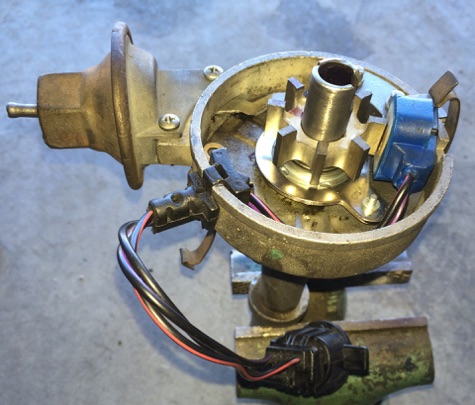
With the rotor removed....
Next you want to remove the vacuum advance. Remove the 2 screws as shown. Remove the C clip and lift off the arm and pull to remove the advance mechanism.
Next, take two flat blade screwdrivers and pry off the starwheel. It will slide up. BEFORE you remove it, mark the side that has the groove with the rollpin in it. Remove the starwheel and make sure you don’t loose the rollpin. Sorry, I do not have any photos of this, but it’s fairly easy to do.
With the starwheel off, you will next need to remove the spring clip at the bottom of the shaft. It resides below the starwheel and secures the VR pickup assembly. Use a flat blade screwdriver to remove the spring clip.
Yes, the starwheel is already removed in these photos, but it is not necessary to be removed in order to remove the vacuum advance.
Remove the screw holding (and grounding) the VR pickup grommet. The entire VR assembly can now be removed.
With the VR pickup removed, there is one more part to remove. I call it the divider plate, because, well, it divides the distributor. It also protects the rotating mechanical advance mechanism from the rest of the assembly which doesn’t really move much.
Remove the last remaining screw. You will have to rotate the divider plate in order to remove it from the distributor. Don’t worry about the orientation. The plate can only be re-installed one way.
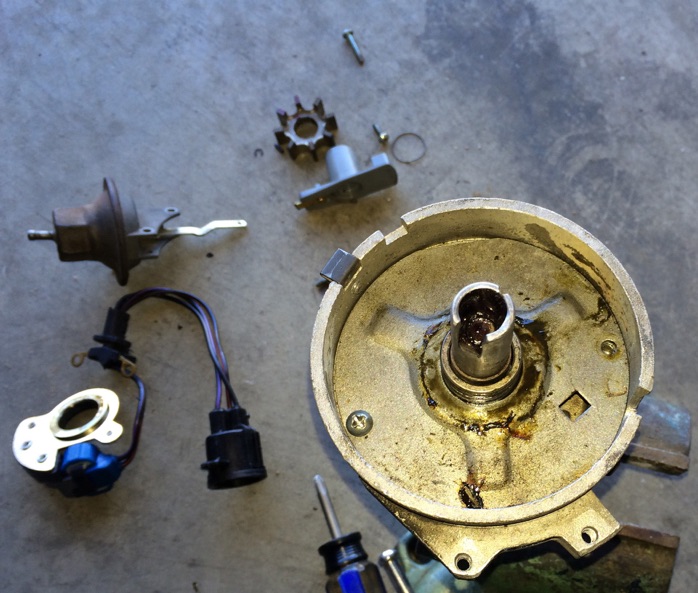
Here are all the parts that need to be removed.
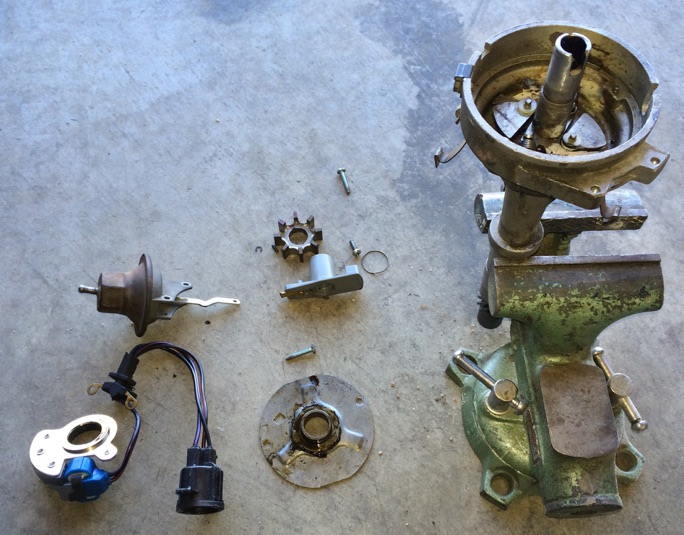
Weld the mechanical advance mechanism so that the shaft can not rotate relative to itself. In other words, lock it together! I used an inexpensive Harbor Freight wire feed welder.
A close up of my not-so-good welding abilities. Again, notice the additional weld spot on the opposite side to help balance out the assembly.
As they say, assembly is reverse of removal. The only thing that is slightly different is pressing the starwheel back onto the rotating assembly.
I used a pair of pliers as shown below to press the starwheel back on. Line up the starwheel with the rollpin groove. You DID mark the correct groove on the starwheel, right?!!
Insert the rollpin into the groove. Use a flat screwdriver to insert the rollpin so that it does not stick out above or below the starwheel. Use the pliers to press the starwheel back on. It is a firm, but not super tight fit. A press is not required for this.
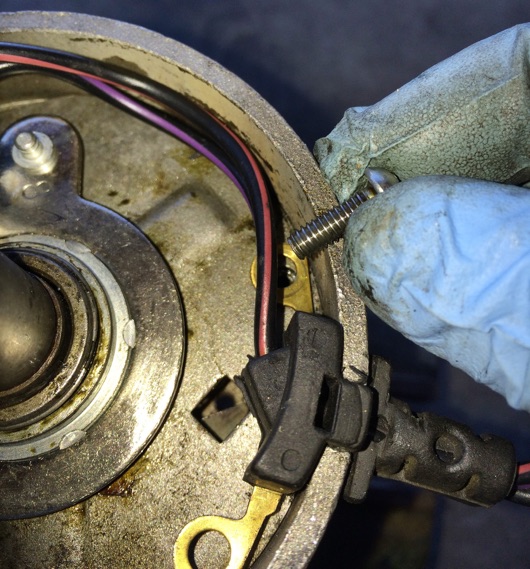
Screw everything else back together. Even though the vacuum advance is not going to be used, you do need it hooked up inside the distributor because it holds the VR pickup assembly in the correct position.
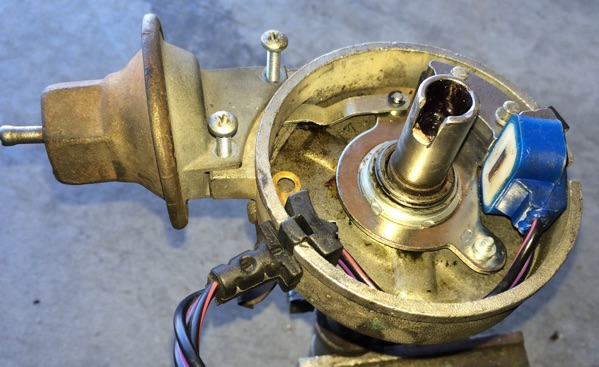
BEFORE:
AFTER: